Apps
Manage your Apps in the Phase Console. This page covers the practical steps for creating, configuring, and administering Apps through the Console UI.
Create an App
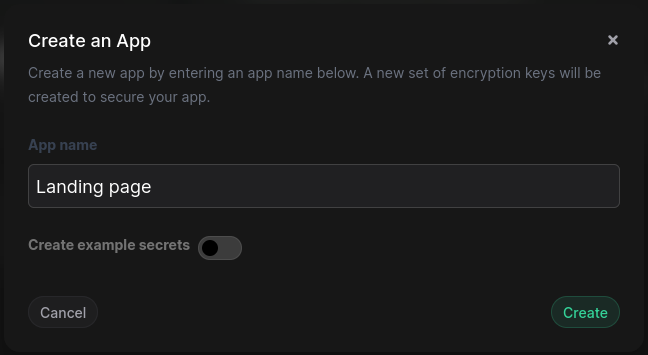
Create an App by clicking the "+" button on the Apps screen. Enter a name for your App and your sudo password if prompted.
You can also optionally choose to initialize your App with example secrets. This option is automatically selected for your first App.
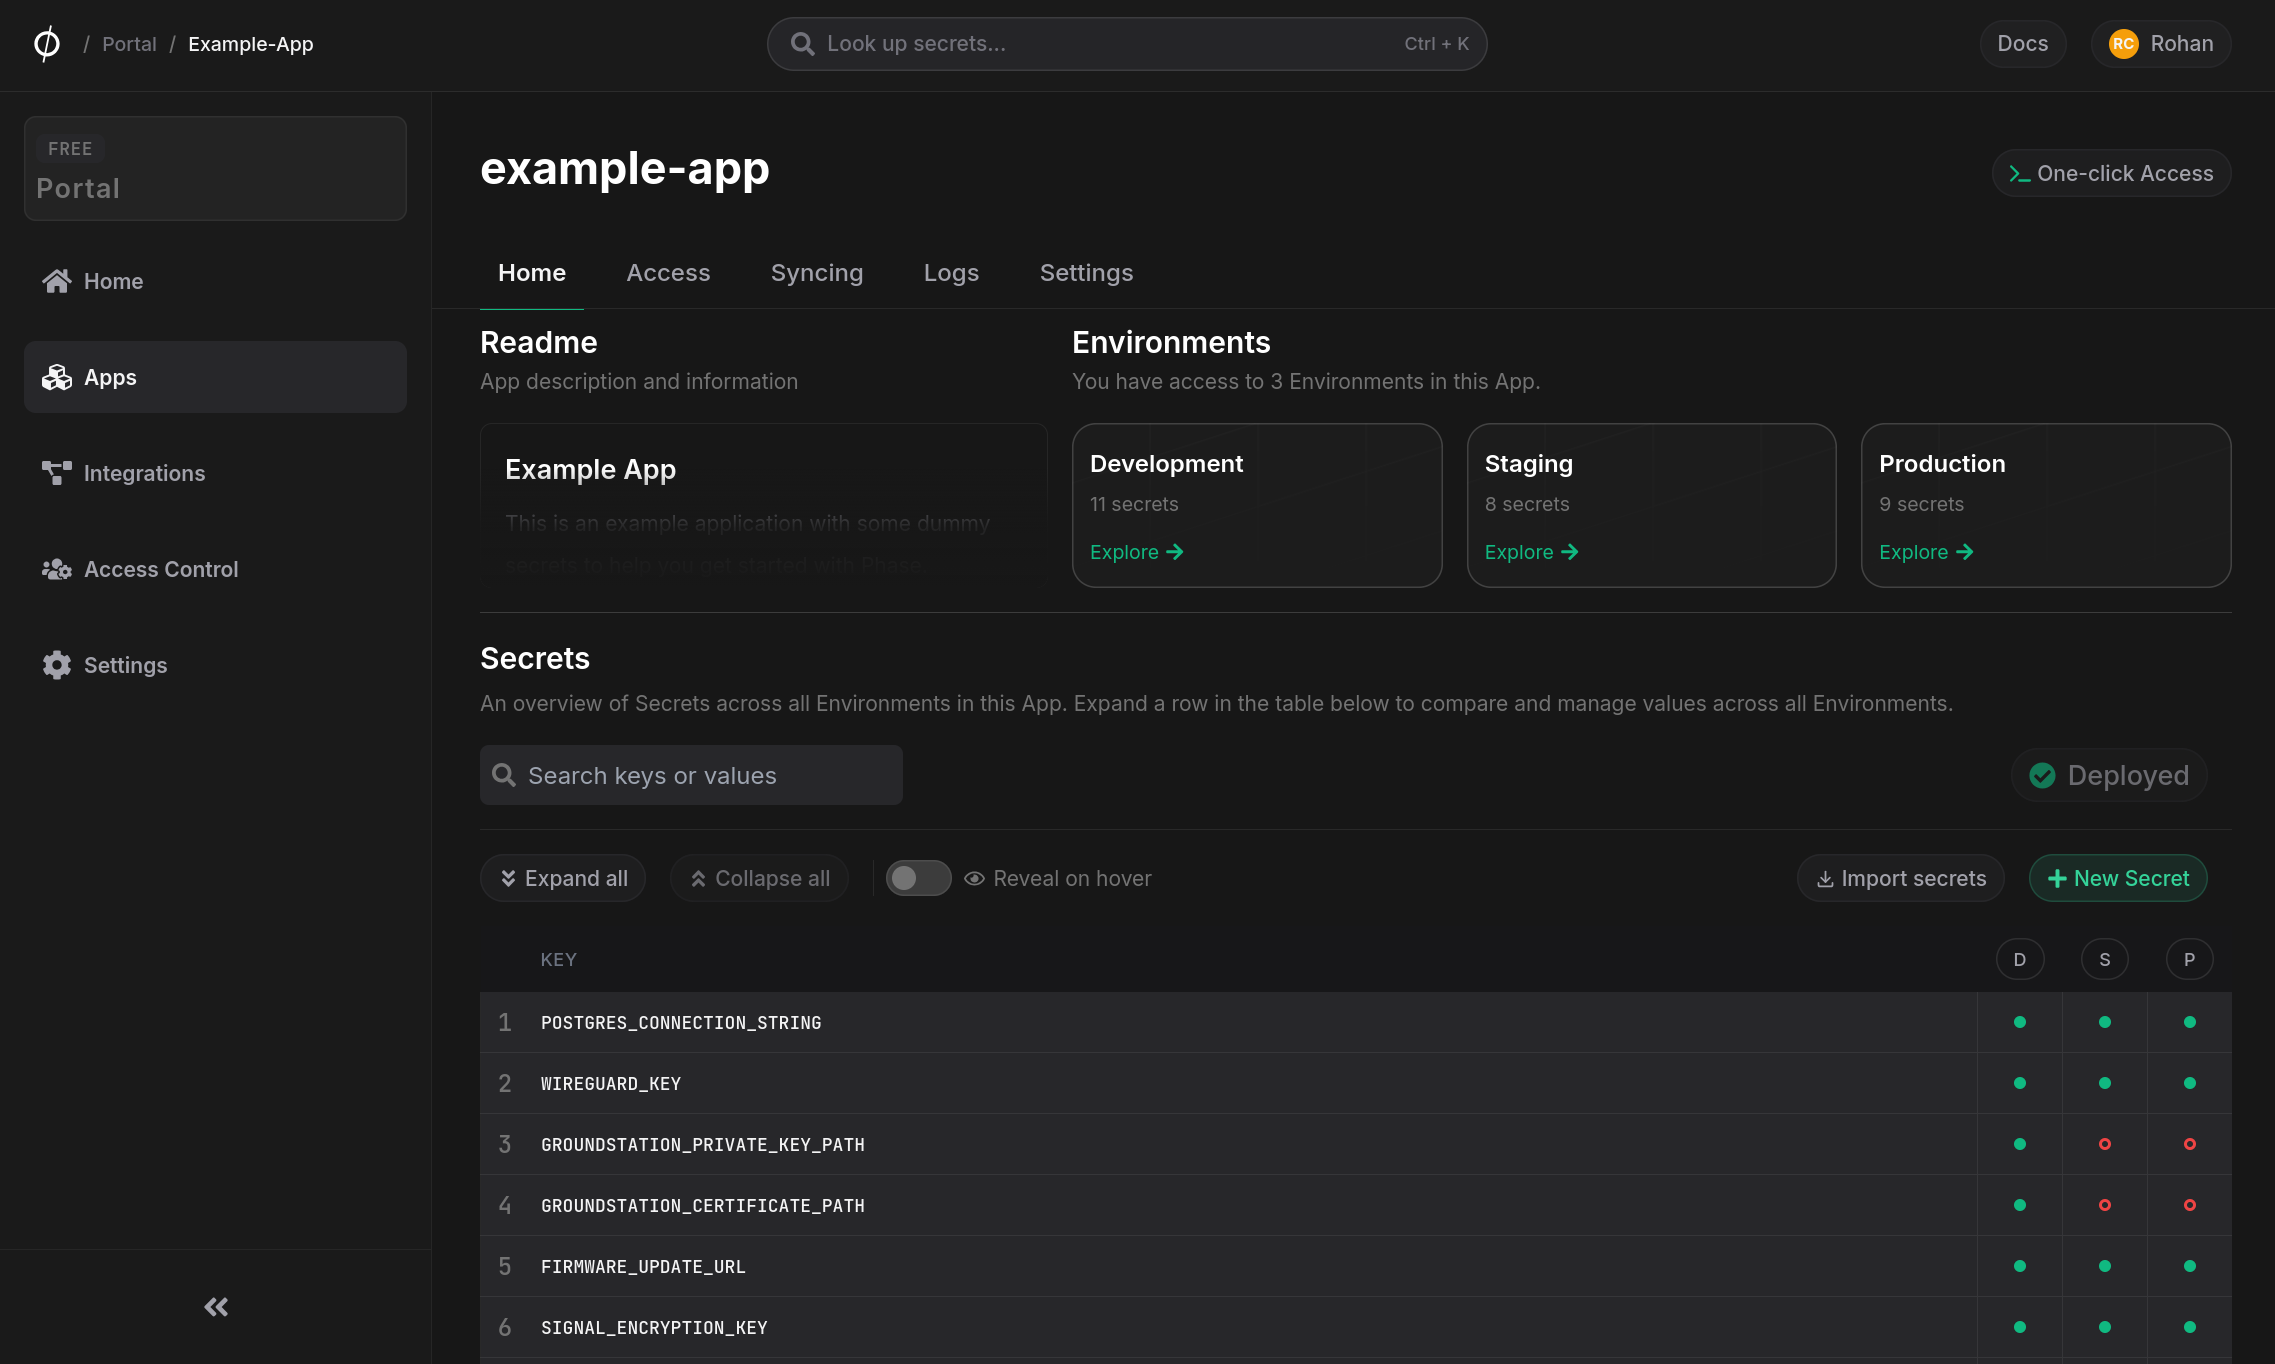
App Readme
Each App can have a readme that serves as a space for developer documentation, runbooks, onboarding notes, or any other relevant information. The readme is displayed on the App's Home tab and supports full markdown rendering.
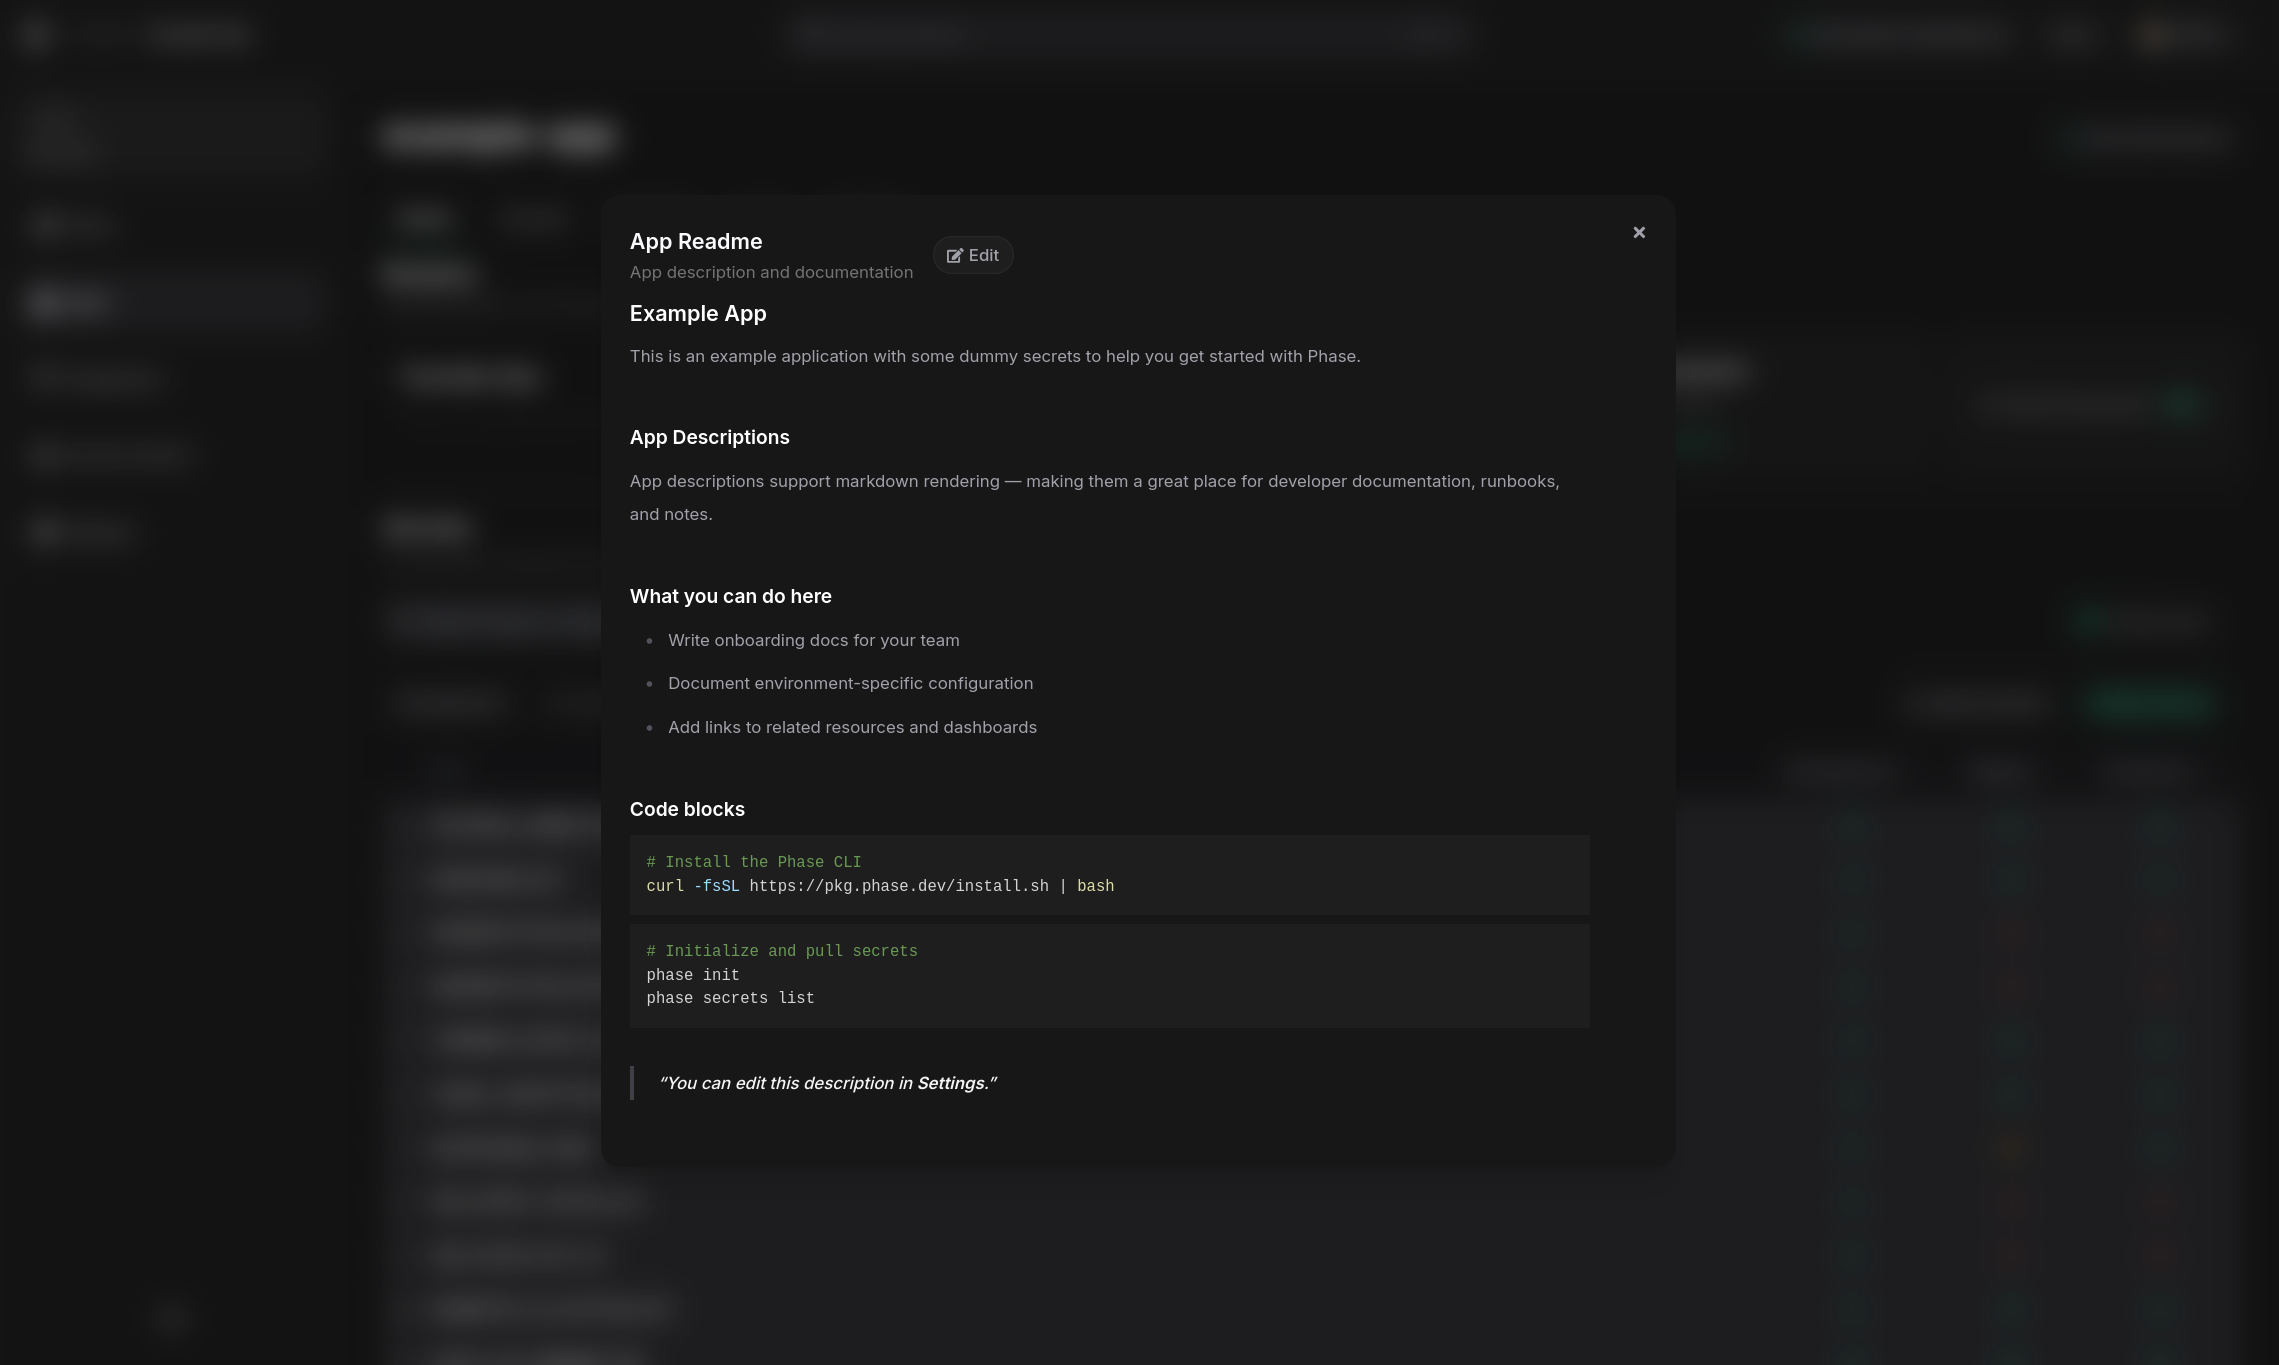
Click the readme to expand it in a full-screen dialog for easier reading.
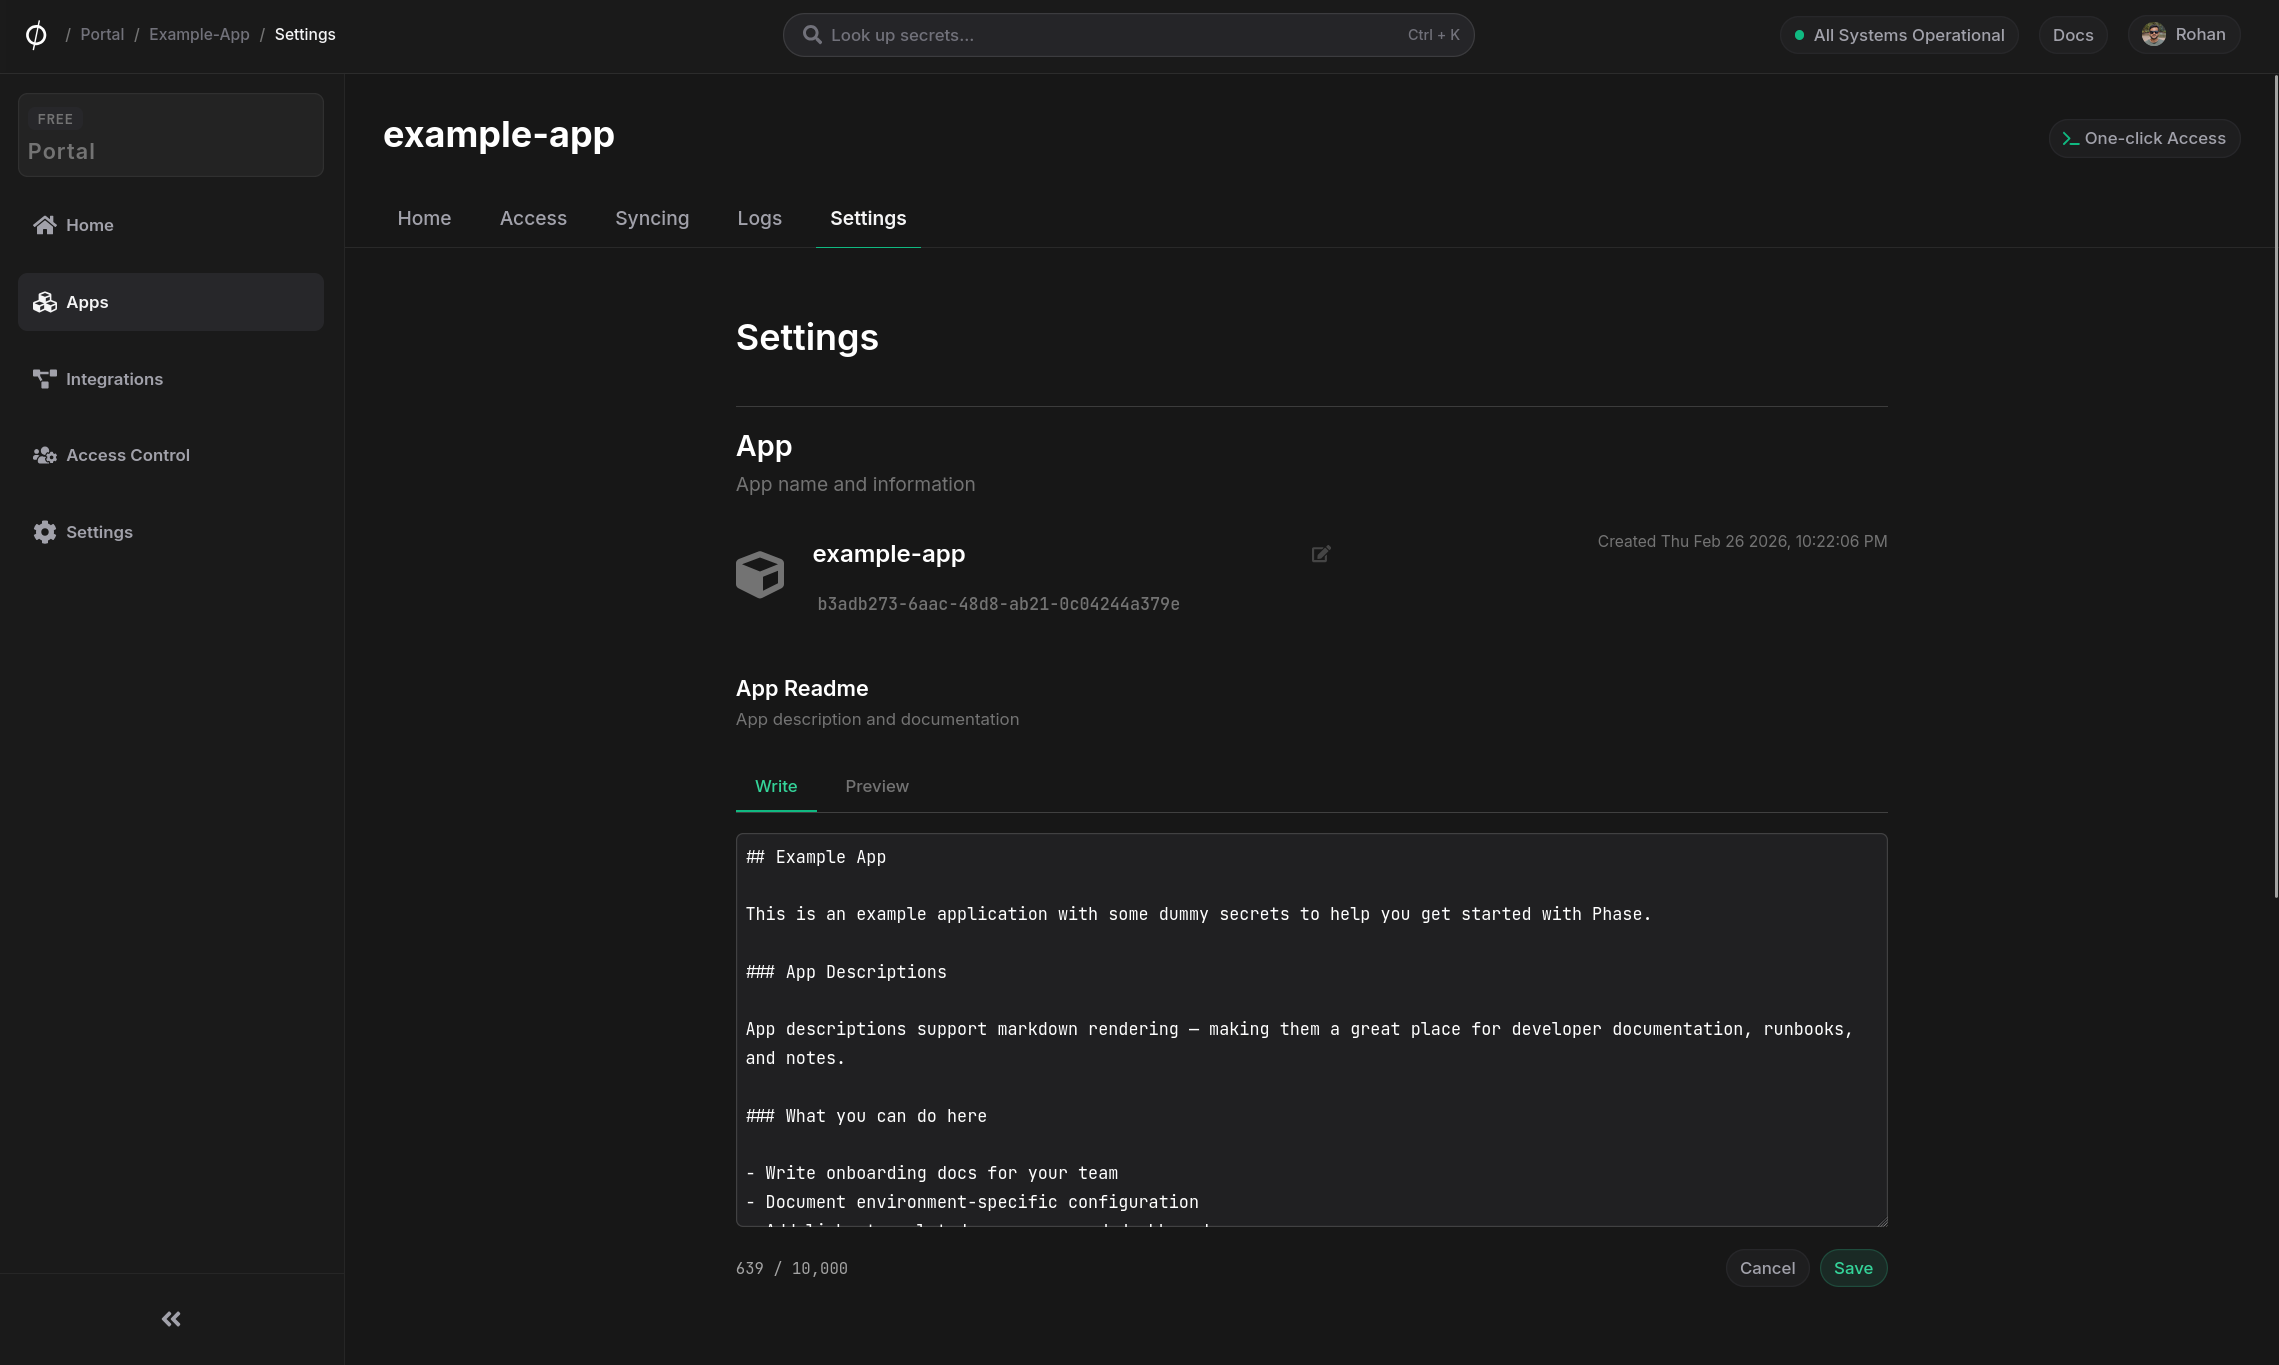
Editing the readme
To add or edit a readme, go to the App's Settings tab. The editor supports a Write and Preview toggle so you can author Markdown and preview the rendered output before saving.
New organisations are created with an example app that includes a sample readme demonstrating the available Markdown features.
Secrets
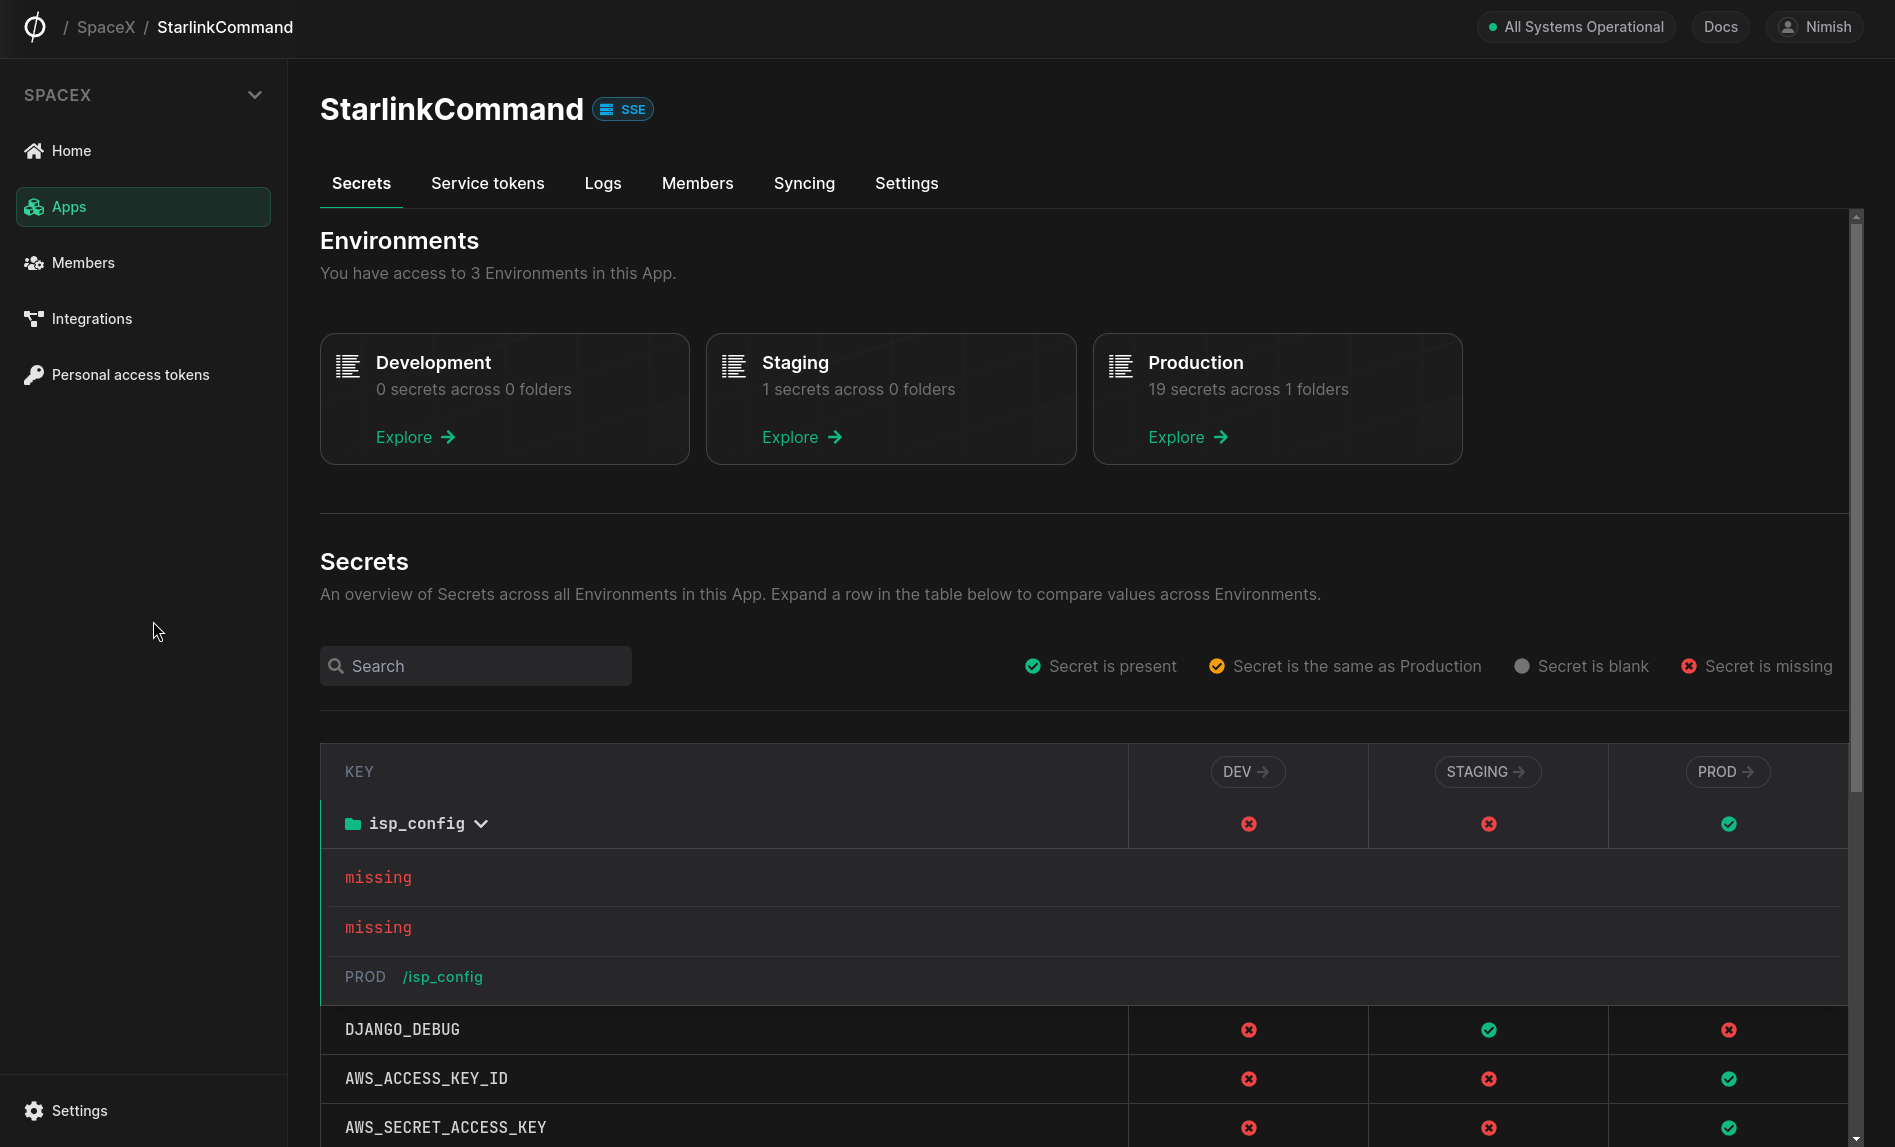
This screen shows an overview of all Secrets in this App across all Environments. You can explore a specific Environment by clicking the Environment name in the column headers. You can expand a Secret to view its status in each Environment. Clicking an Environment name will take you to this Secret in the respective Environment management screen.
One-click secret access
The Phase Console has a "One-click access" menu in the top right of the screen when inside of an App. Open this menu and click to copy a one-liner for either the CLI or REST API to fetch secrets from the current environment and path.
A temporary Personal Access Token (PAT) is automatically generated and copied to your clipboard to authenticate the request. The token is valid for 5 minutes. You may modify the one-liners to best suit your needs.
Access
Add a service account to an App
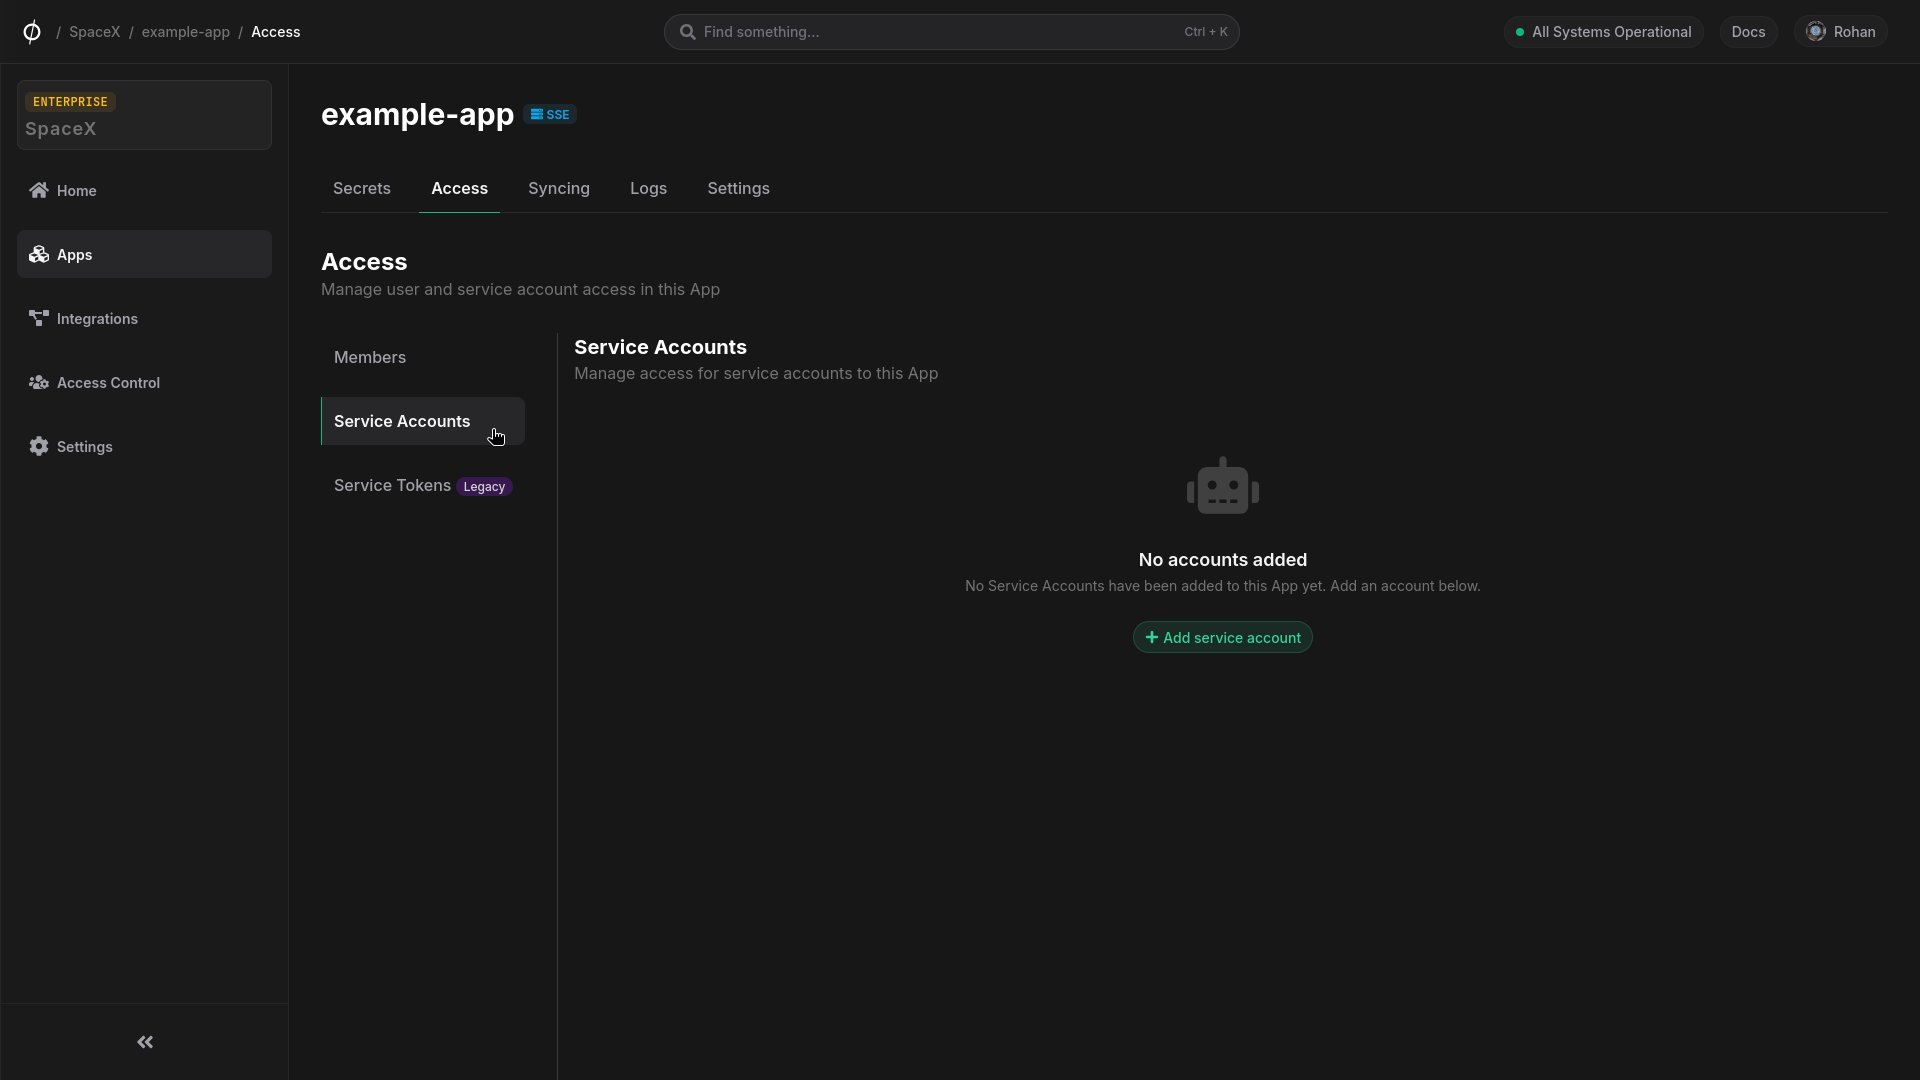
You can add a Service Account to any App from the respective App's "Access" tab.
- Click "Service accounts" on the left, and then "Add service account"
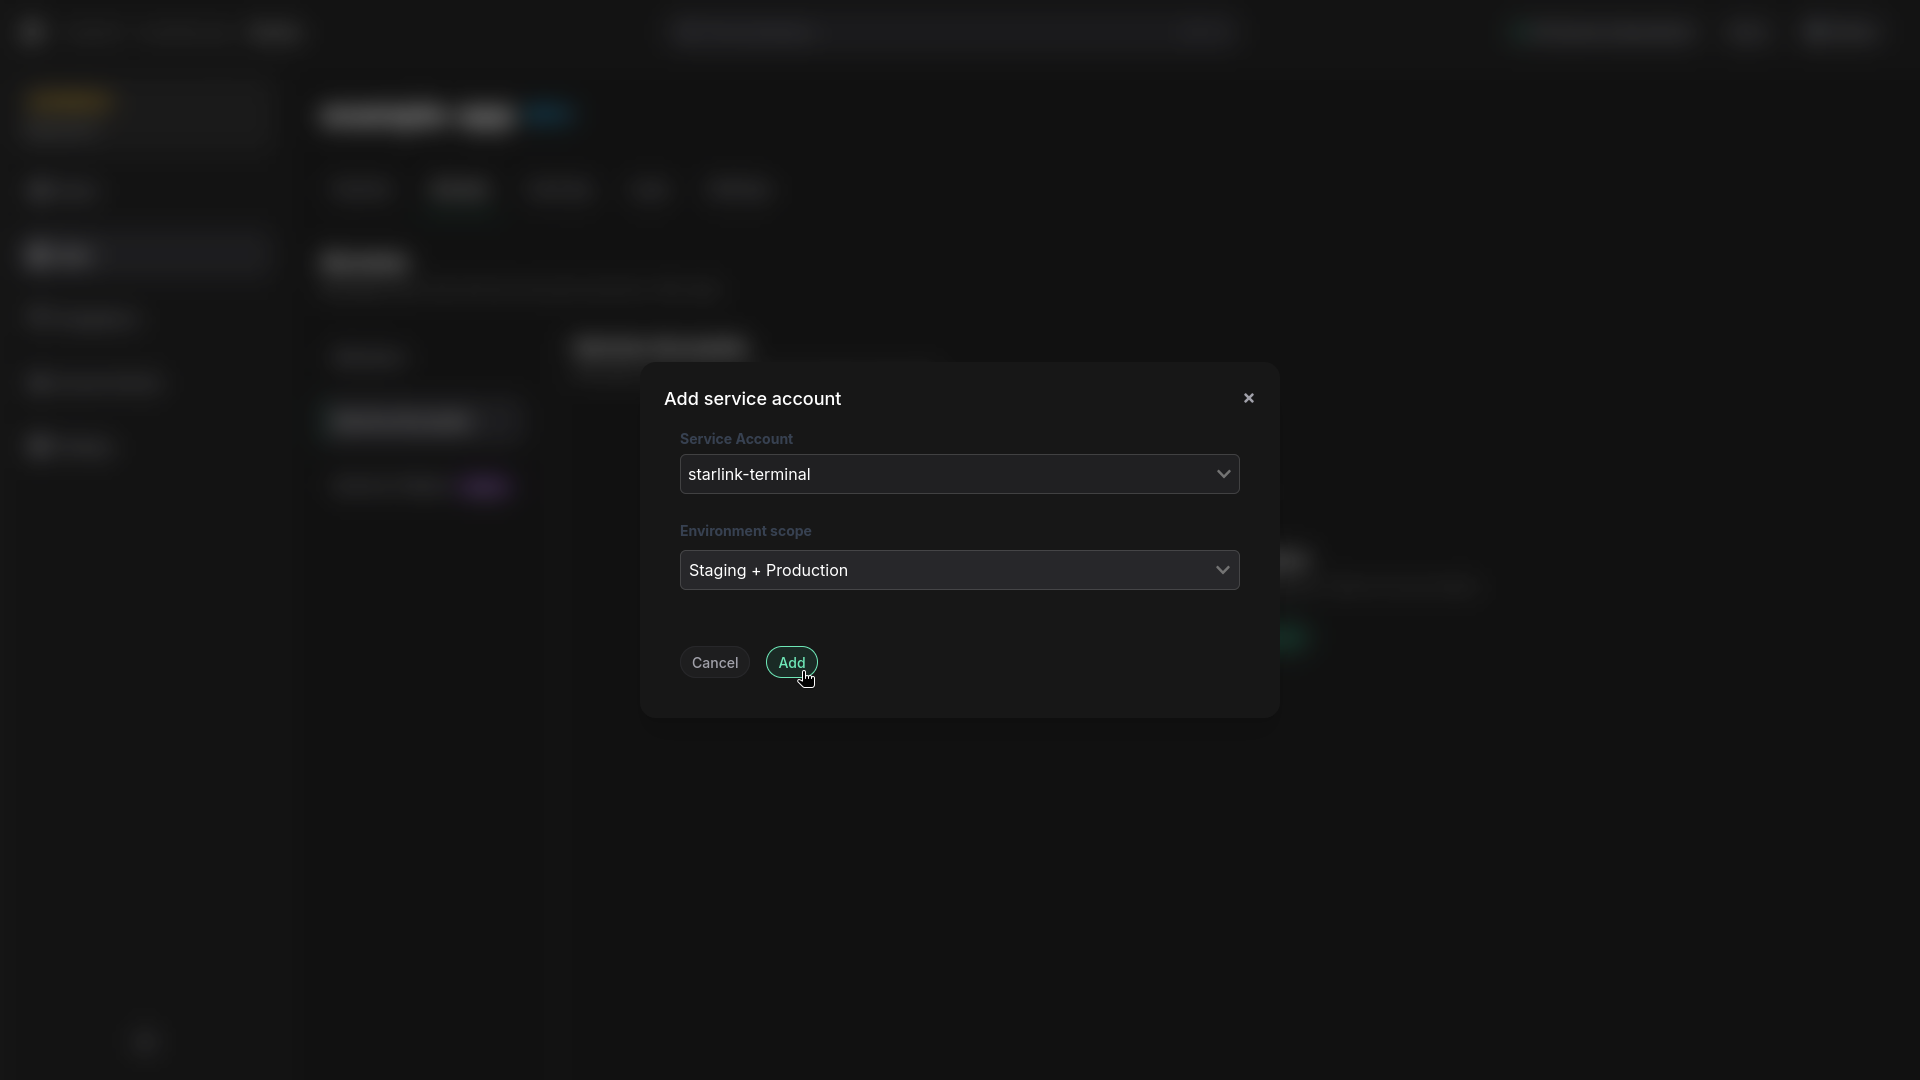
- Select the service account from the list of accounts. Next, select the Environments that this account should have access to. Once you have selected the account and scope, click "Add"
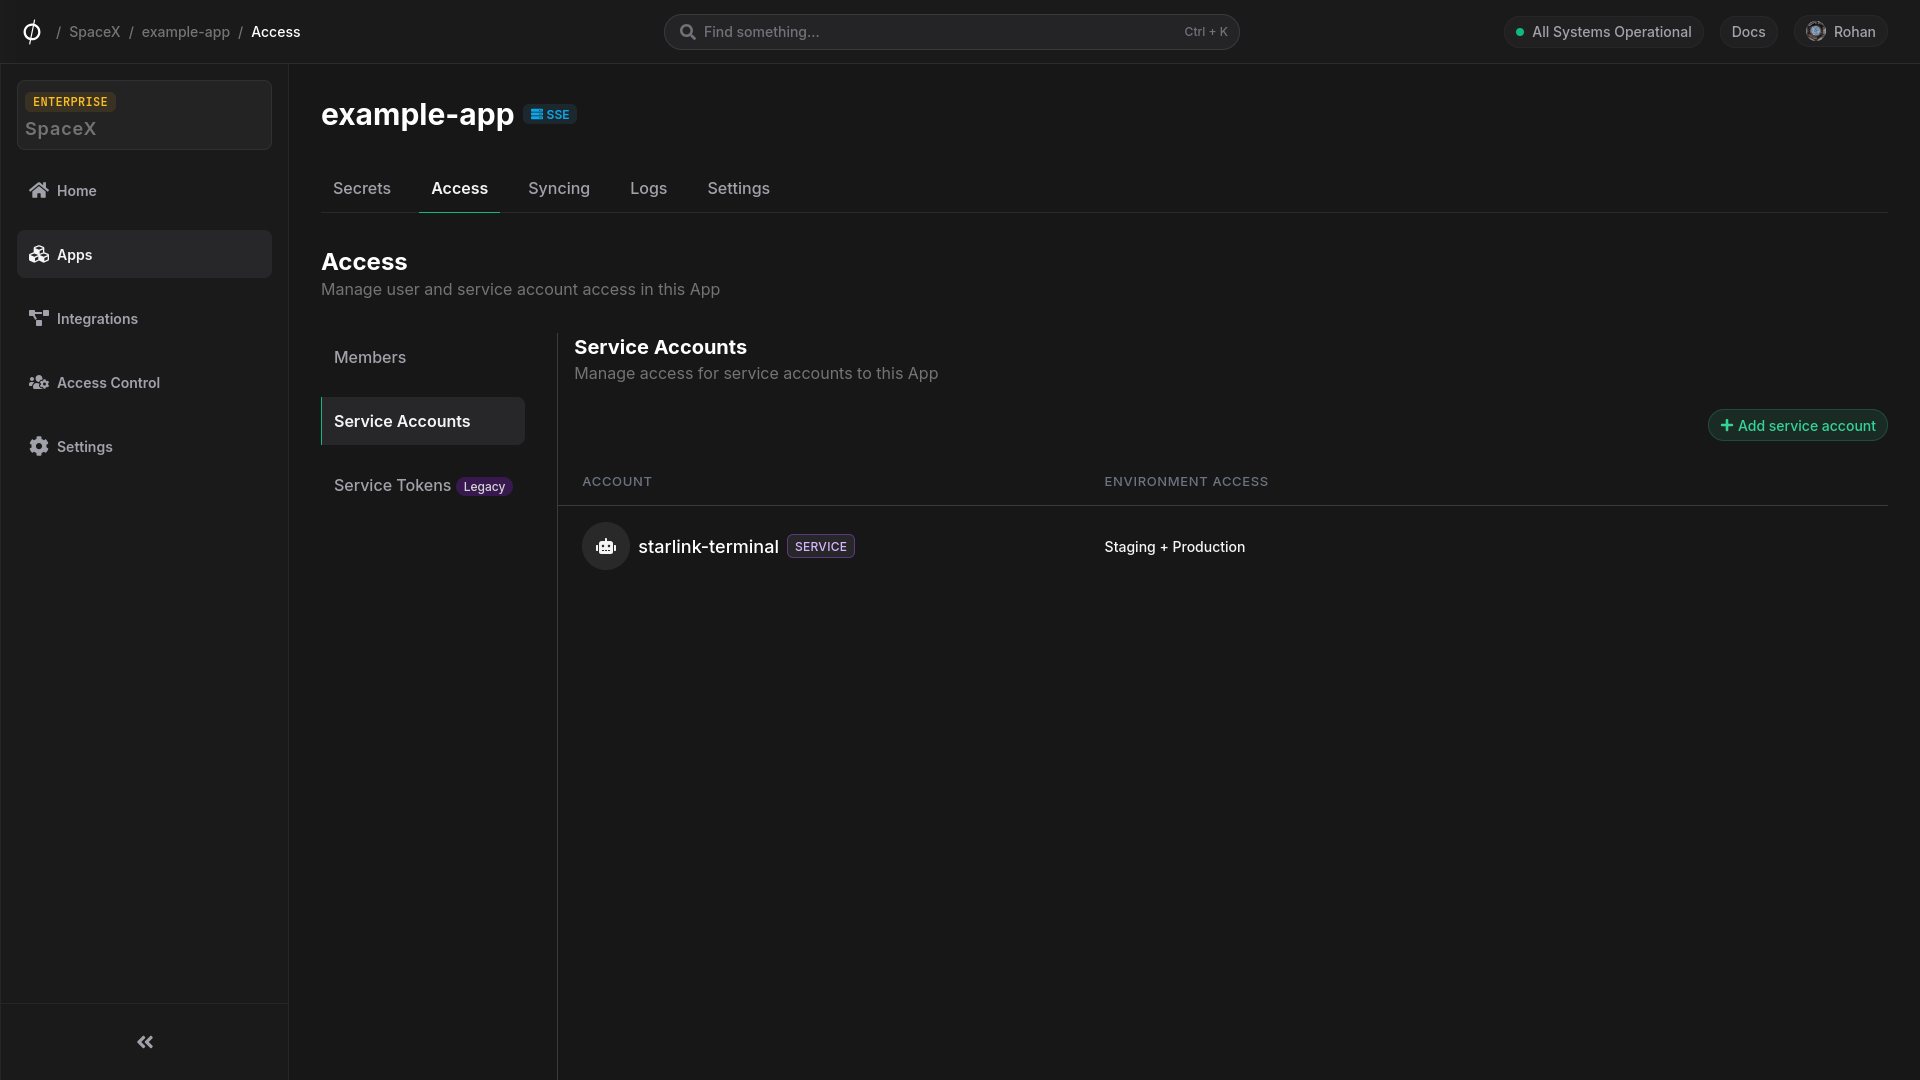
- The account will now have access to the Environments you selected. You can always update the Environment scope for this account or remove it from the App entirely.
Add a member to an App
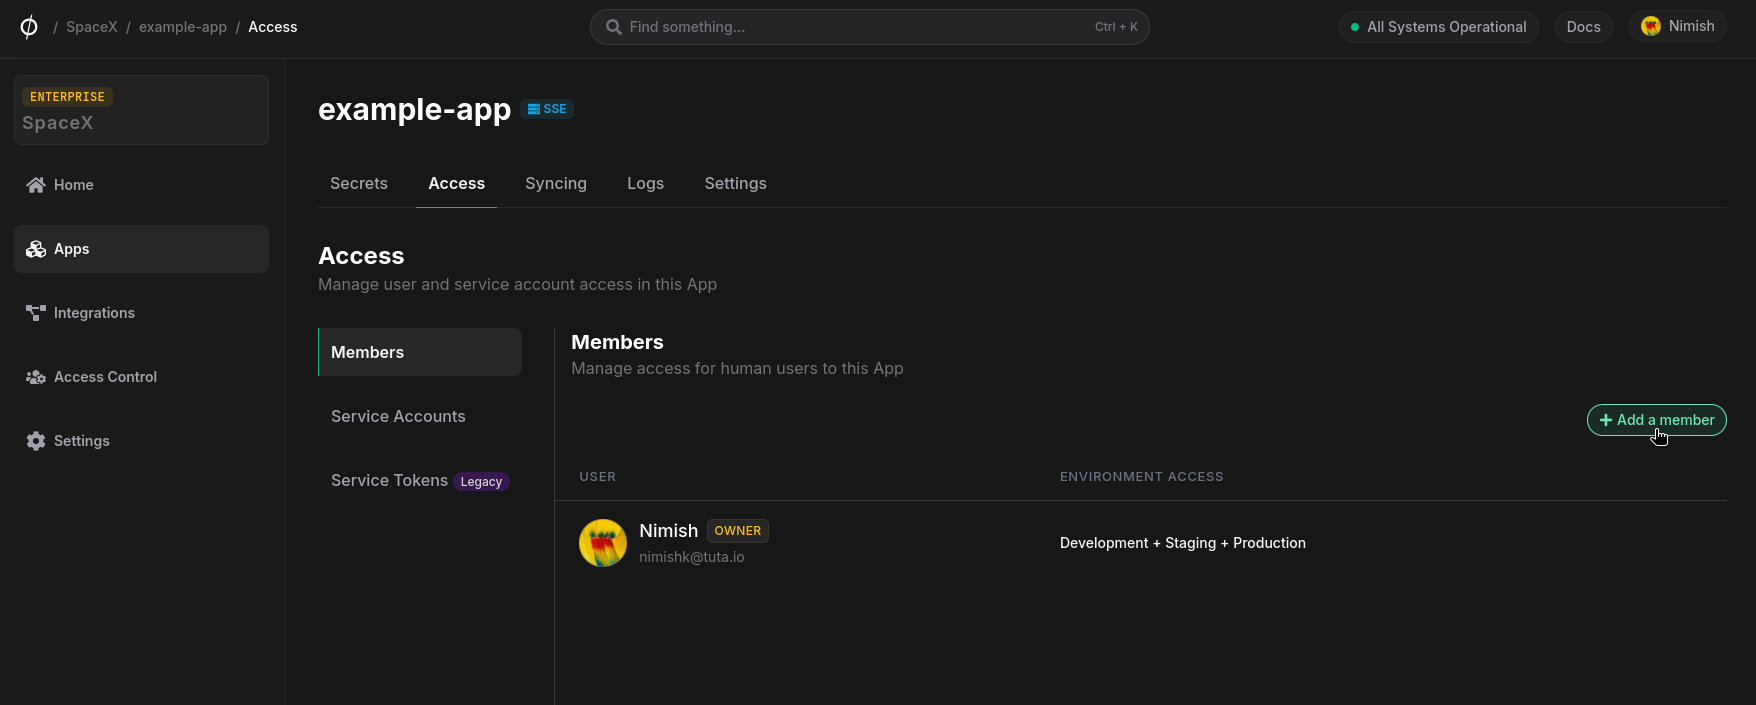
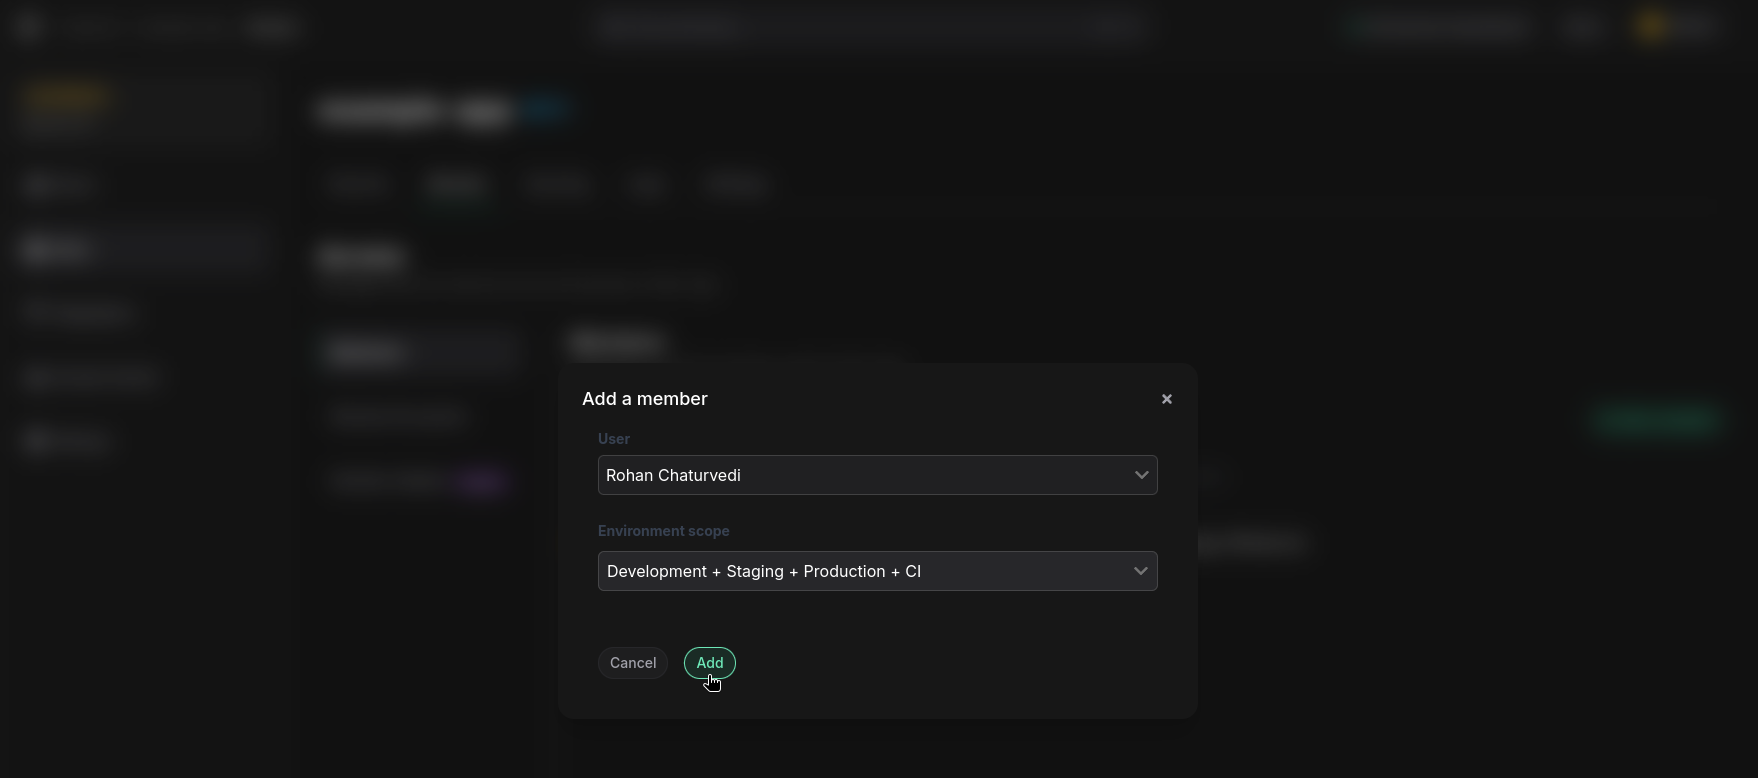
You can add a new user to any App from the respective App's "Access" tab. To add a member to an App, click the "+ Add a member" button. Select an Organization member from the dropdown list, select which Environments to grant them access to, and click "Add".
Update Environment access for a member
To update the Environments that a specific user can access, click the "Manage user access" button. Update the Environment selection and click "Save".

Remove a member from an App
To remove a member from an App, click the "Remove member" button.
Syncing
Phase can automatically sync secrets to third-party platforms. For more on how syncing works, see Platform > Apps > Secret Syncing.
Setting Up a Sync
To set up a new sync:
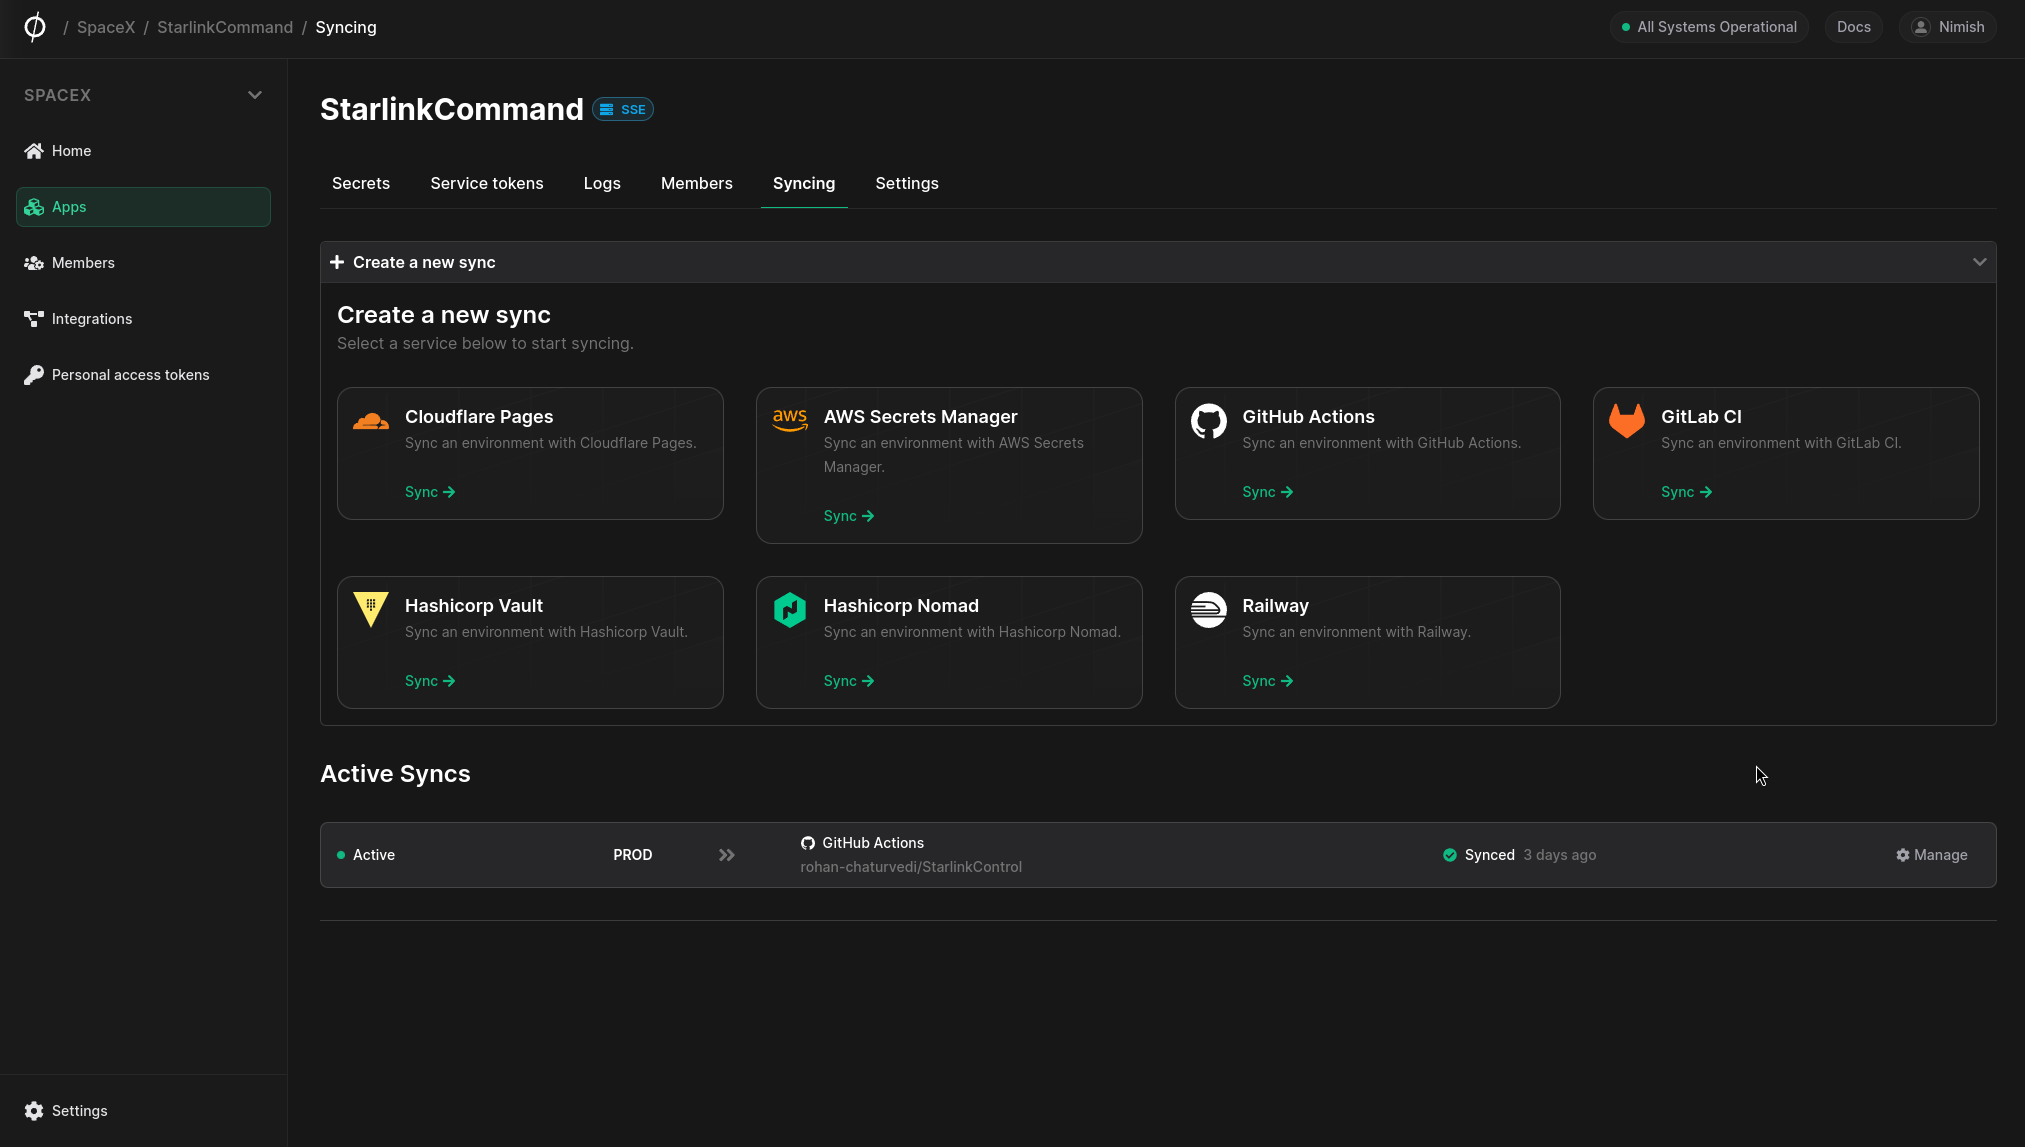
- Navigate to the "Syncing" tab in your App.
- Click on "Create a new sync" and select the desired service.
- Follow the prompts to configure the sync, including selecting the Environment and specific secrets to sync.
Server-Side Encryption (SSE) must be enabled for the App to use secret syncing integrations. See Enabling SSE below.
Logs
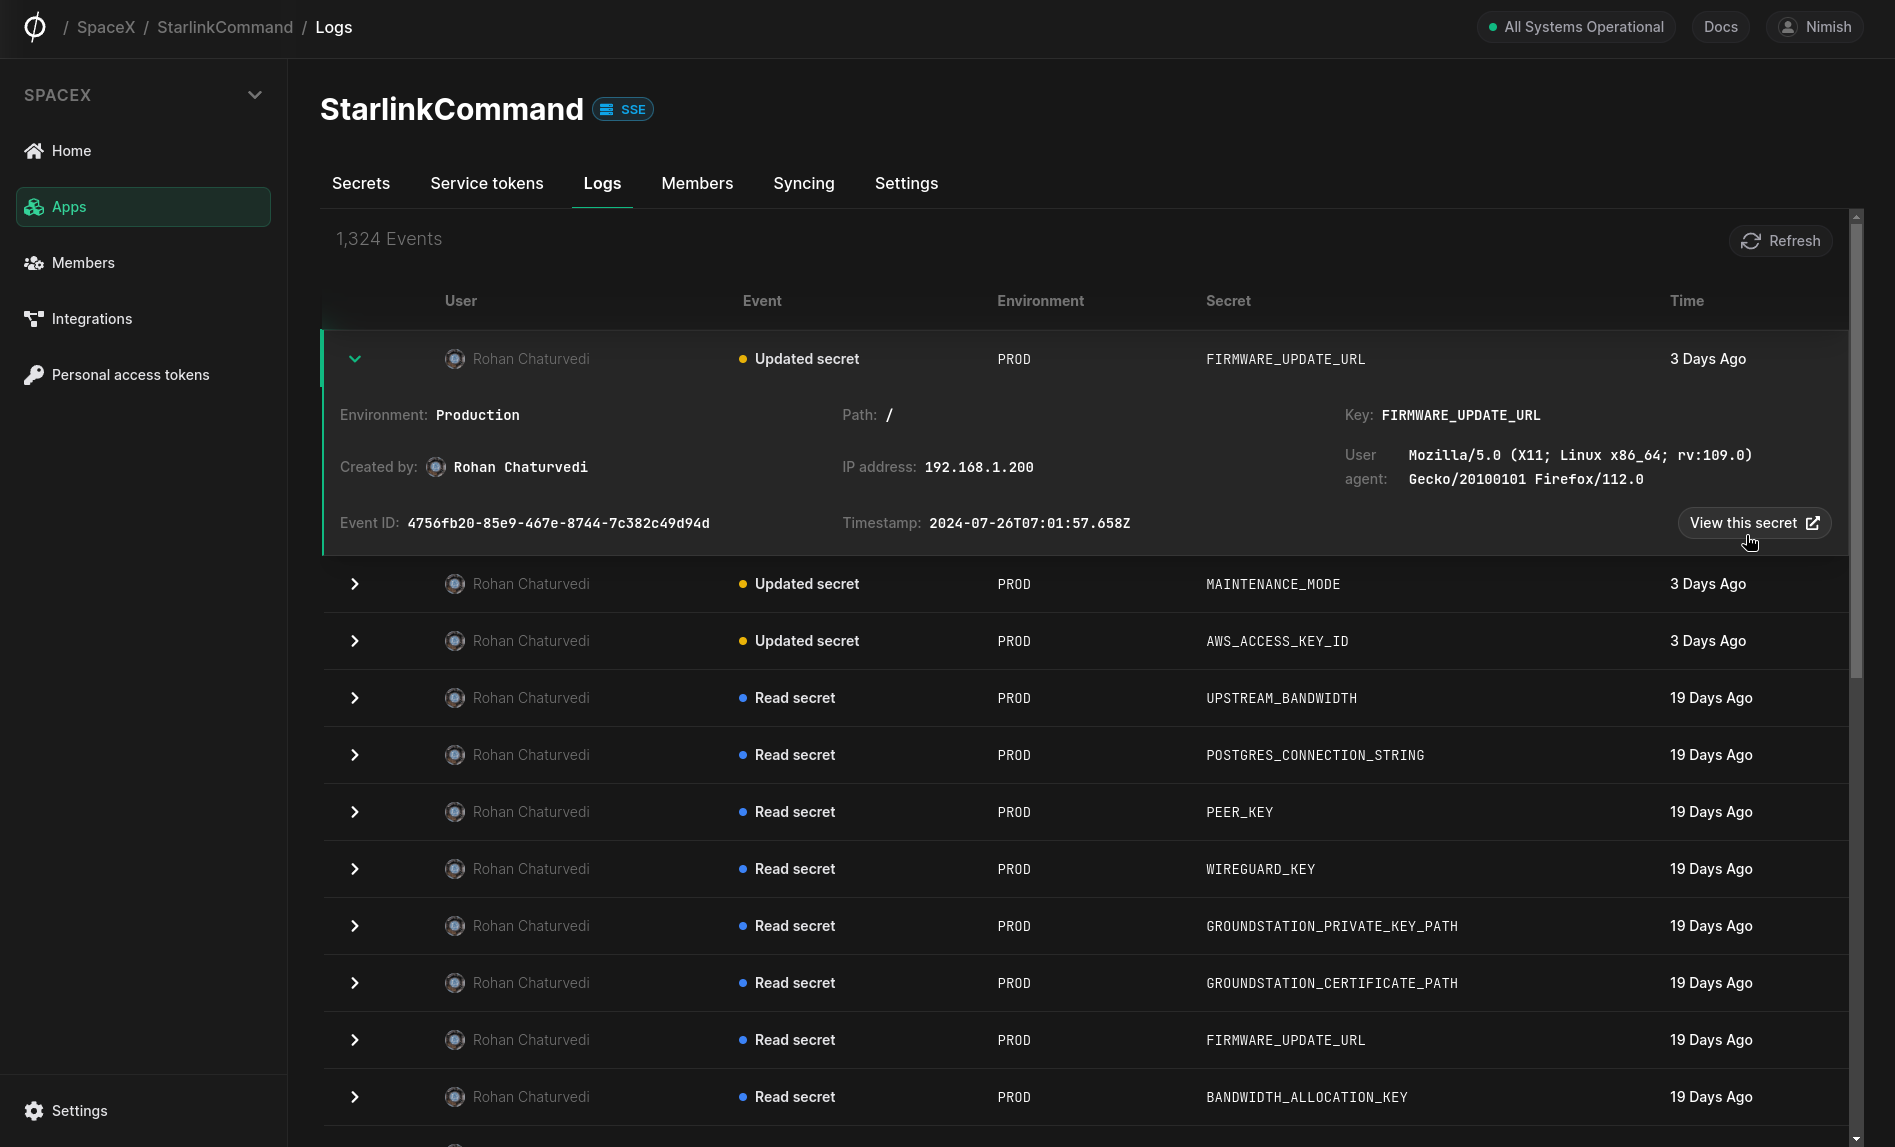
This screen shows audit logs for all CRUD events for all Secrets and Environments in this App. You can expand a specific log event to view more information.
Settings
This screen shows metadata for the App and allows you to perform administrative tasks such as changing the encryption mode or deleting the App.
Enabling SSE
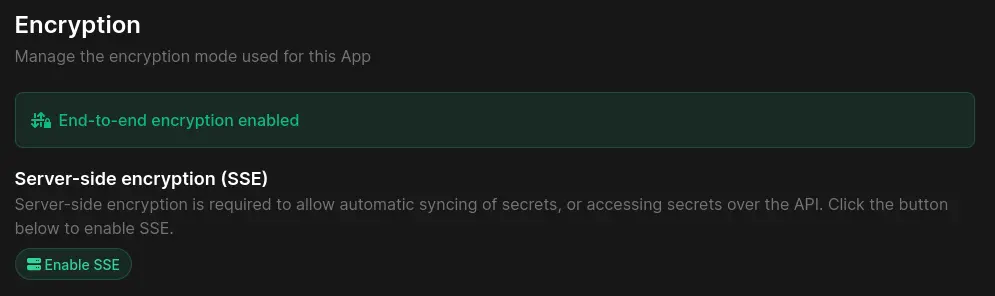
Phase Apps use end-to-end encryption (E2EE) by default. To use features like third-party integrations, the public REST API, or Dynamic Secrets, you need to enable server-side encryption (SSE). For more on encryption modes, see Platform > Apps > Encryption Modes.
To enable SSE, click the "Enable SSE" button under the "Encryption" section of the App Settings tab.
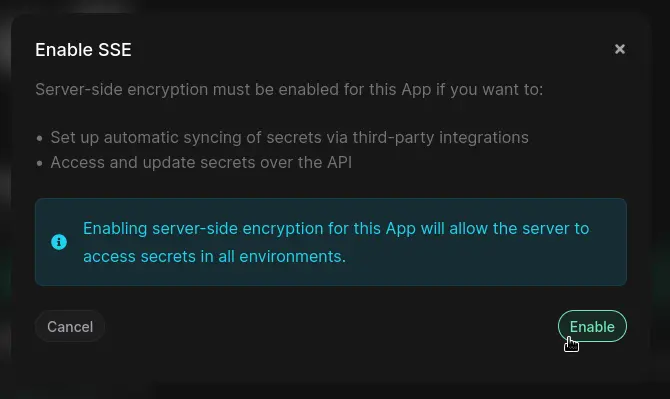
Click "Enable" on the confirmation dialog:
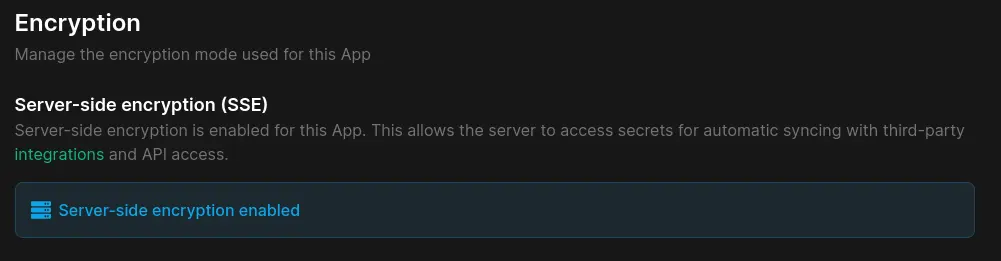
Once enabled, the settings page will show you the updated Encryption mode:
Delete an App
To delete an App, click the "Delete" button in the Settings tab.
Deleting an App will permanently delete all Environments, Secrets, and Tokens associated with it.